
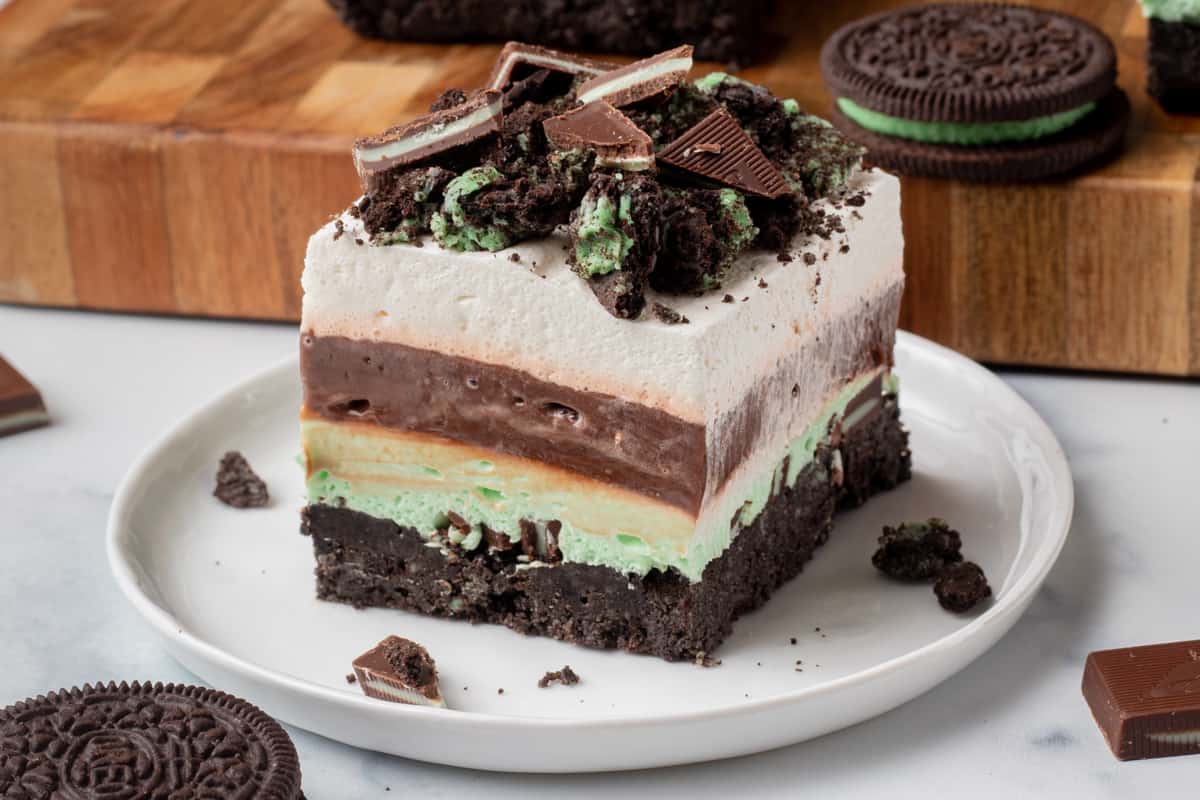
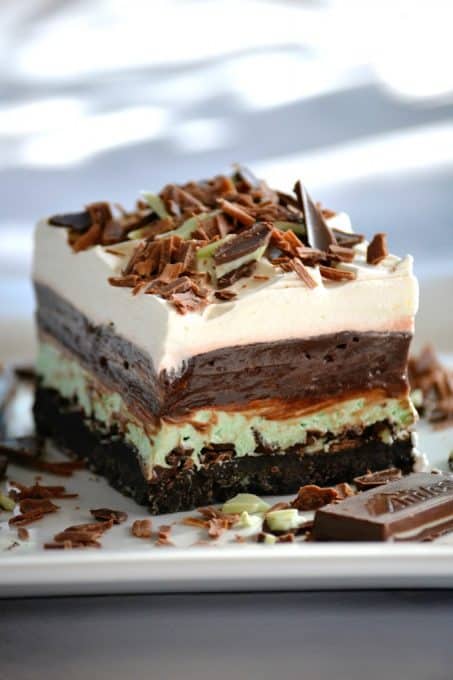
Chocolate Mint Dream Bars are a super easy and delicious treat that you don’t even need to bake. Imagine a bottom layer made of minty Oreo cookies, followed by a layer of creamy peppermint cheesecake, then a layer of rich chocolate fudge pudding, and finally, some chopped Andes mints on top. It’s a fantastic recipe for a delightful chocolate mint dessert!
Mixing the refreshing taste of mint cream with the sweetness of chocolate is one of the most enjoyable flavor combinations, especially after a meal. I blended the flavors of Andes mints with my well-loved Dream Bars to make a delicious new favorite!
Chocolate Mint Dream Bars were a big hit from the very first taste. I’ve made them so many times since that first batch, and everyone just loves them.
The touch of green in the middle makes them perfect for St. Patrick’s Day or Christmas, but you don’t need a special occasion to make this simple, no-bake dessert.
Believe me, I make them throughout the entire year because they are simply that delicious.
What do I need?
Don’t feel overwhelmed by the many layers in this dream bar recipe. It’s actually quite easy to make once you have all the ingredients ready to go.
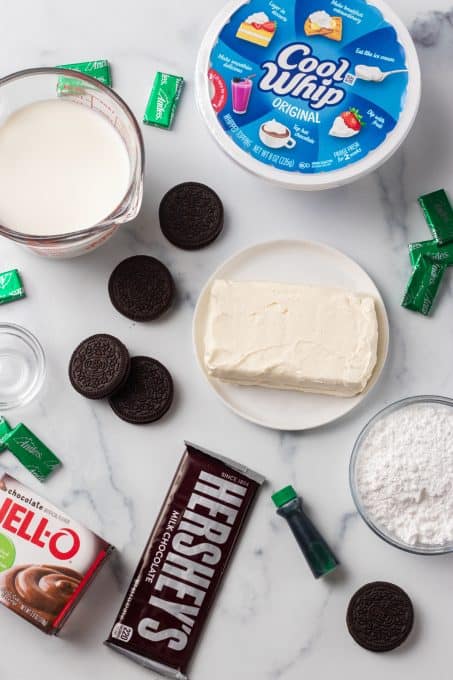
Here are the ingredients you will need:
- Certainly! Here’s a shuffled version of the ingredients:
- Andes mints
- Chocolate shavings
- Peppermint extract
- Cool Whip – or use this homemade stabilized whipped cream
- Milk
- Confectioner’s sugar
- Green food coloring
- Mint Oreo cookies
- Butter
- Instant chocolate fudge pudding mix
- Cream cheese
How do I make it?
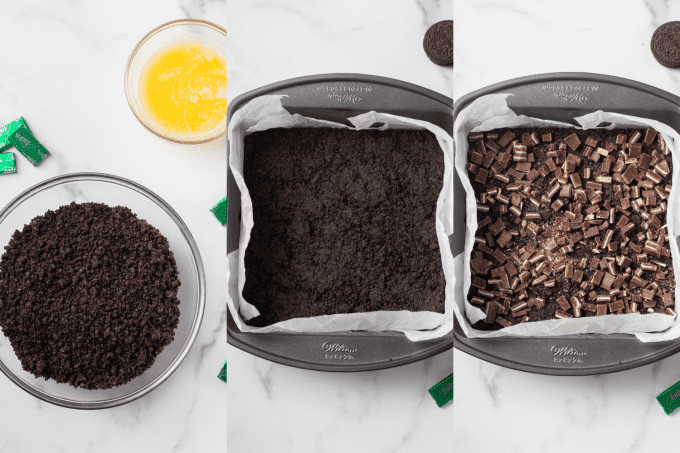
- Make the crust: Use a food processor to pulse the mint Oreos until they become crumbs. Mix the crumbs with melted butter, then press the mixture into the bottom of a square baking dish. Pop the crust into the freezer while you prepare the other layers. Chop up your Andes mints and keep them aside until it’s time to put together the bars.
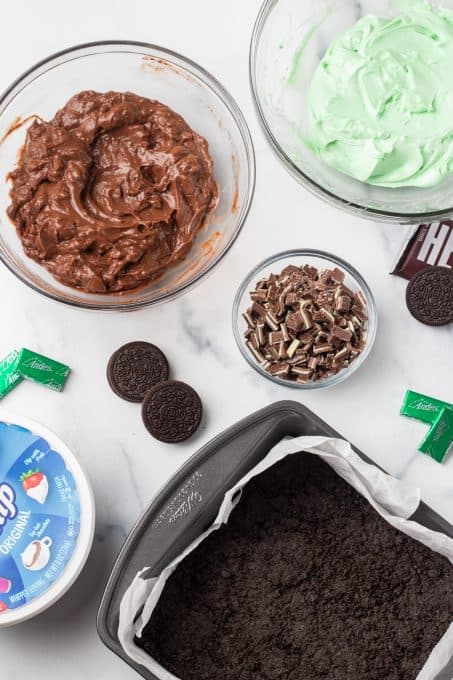
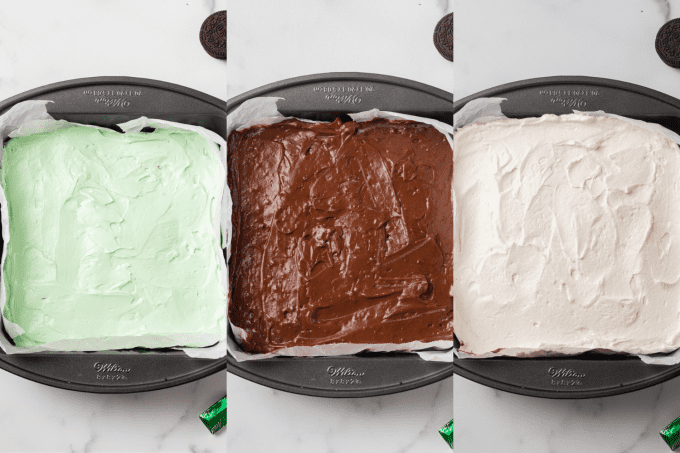
- Make the cheesecake layer: Beat together cream cheese, confectioner’s sugar, extract, and a few drops of green food gel. Gently fold in a cup of cool whip. The result should be a light, creamy, and fluffy mixture!
- Prepare the chocolate pudding: Whisk together the instant pudding mix with milk and let it chill in the refrigerator until you’re ready to add it to the bars.
- Assemble: Now it’s time to layer all the ingredients to create your incredible Chocolate Mint Dream Bars.
Assemble the layers on the Oreo crust in this order:
- Chopped Andes mints
- Peppermint cheesecake
- Chocolate pudding
- Remaining Cool Whip
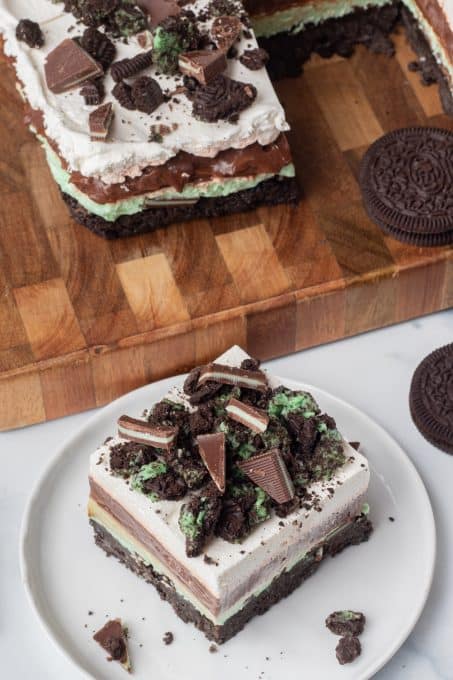
Let the assembled bars chill for at least 2 hours or even overnight. About 30 minutes before serving, transfer the bars to the freezer to make slicing easier.
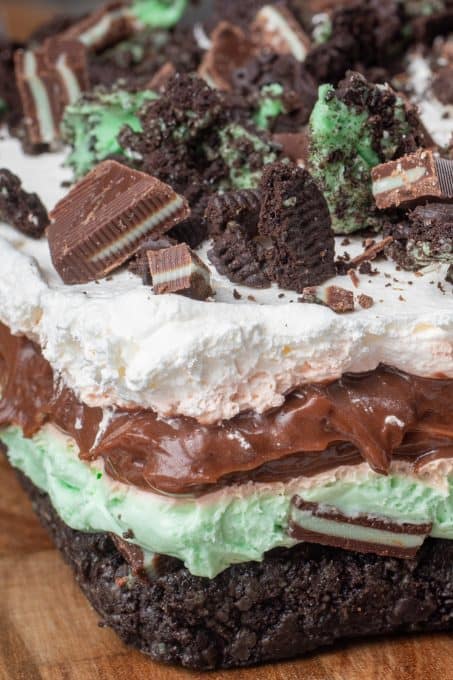
For the perfect finishing touch, decorate your Chocolate Mint Dream Bars with crushed mint Oreo cookies, shavings from a chocolate bar, and additional chopped Andes mints!
How do I store them?
Keep your Chocolate Mint Dream Bars, along with my other no-bake dream bar recipes, chilled when not being enjoyed.
Store these bars in the refrigerator, covering them with plastic wrap or foil. The cold temperature maintains the ideal consistency for slicing and helps preserve the cream cheese layer for as long as possible. When covered and chilled, this chocolate mint dessert should stay good for up to 5 days.
What can I substitute for Cool Whip?
If you prefer not to use the non-dairy whipped topping in the tub with the blue label (you know the one I’m talking about!), you can try this fantastic recipe for stabilized whipped cream.
It makes the perfect amount for each of my Dream Bar Recipes. The recipe is gelatin-free (suitable for vegetarians!) and tastes incredibly delicious. You can even use it as a piped frosting for other recipes! Pretty great, huh?
More Tips for Making Dream Bars
I prefer making my dream bars in an 8×8 disposable baking dish because it comes with a cover, making it easy to take to potlucks and parties.
I highly recommend lining your baking dish with parchment paper. Once the bars have set, you can simply lift the parchment paper’s sides to easily remove them from the pan. It’s super convenient!
Feel free to double this recipe! Just use a 9×13-inch baking dish instead. Your friends and family will definitely appreciate the extra deliciousness.
In all of the Dream Bar recipes, use only the 1 1/2 cups of milk called for in the recipe, not the 2 cups mentioned on the box. This ensures the pudding is a bit thicker for a well-set dessert.
When slicing, a helpful tip is to run a large knife under hot water and then dry it off before making each cut. This way, everyone will be impressed by the beautiful layers when you serve them!
Dream Bar Recipes
Did you know I’ve got 18 different dream bar recipes on this site? I just can’t resist coming up with all the flavor combinations when a no-bake dessert is as deliciously easy as this. And, of course, there will be plenty more to come!
For all the strawberry fans out there, my Strawberry Cheesecake Dream Bars should be at the top of your list. And if you’re a blueberry lover, you’re bound to fall in love with the Blueberry Almond Dream Bars.
When I realized that the creamy cheesecake filling would go perfectly with a burst of citrus flavor, I created not one, but TWO orange dream bars: Orange Creamsicle Dream Bars and Cranberry Orange Dream Bars.
And we haven’t even touched on the chocolate dream bars category yet, folks. While Chocolate Peanut Butter Dream Bars are a classic, I might even love these Turtle Dream Bars with caramel and pecans more! Then, there’s the ever-popular Oreo Pudding Dream Bars that my readers can’t get enough of.
If you need something guaranteed to impress a peanut butter lover in your life, look no further than this recipe for Peanut Butter Cookie Dough Dream Bars.
For the little ones, my Circus Animal Cookie Dream Bars are always a hit! And for the grown-ups, how about a plate of Irish Cream Dream Bars to serve with your after-dinner coffee?
If there’s a gender reveal party in your future, consider making both the pink Raspberry Cream Dream Bars and the Blue Raspberry Dream Bars! Guests can pick which sex they think the baby will be by choosing the gender dessert!

But first, let’s go enjoy some Chocolate Mint Dream Bars!
An irresistible no-bake chocolate mint dessert! These easy dream bars are filled with Andes mint candies, creme de menthe flavor, and fudgy chocolate.
Chocolate Mint Dream Bars : Recipe Information
| CREATED BY | Lynne Feifer |
|---|---|
| Recipe Name | Chocolate Mint Dream Bars |
| COURSE | DESSERT |
| CUISINE | AMERICAN |
| PREP TIME | 45 MINUTES |
| TOTAL TIME | 3 HOURS 15 MINUTES |
| PEOPLE | 9 |
Chocolate Mint Dream Bars : Description
Chocolate Mint Dream Bars make for a delightful no-bake dessert with multiple layers of indulgence. These bars feature a mint Oreo crust, followed by a luscious peppermint cheesecake filling, a layer of chocolate fudge pudding, and finally, chopped Andes mints. It’s a simple yet delicious recipe for a chocolate mint treat!
Chocolate Mint Dream Bars : Ingredients
| Crust | 15.25 ounce package Mint Oreo cookies divided 5 tablespoons unsalted butter 4.6 ounces Andes Mint candies chopped, divided (about 26 candies) |
|---|---|
| Peppermint Layer | 8 ounces cream cheese room temperature ½ cup confectioners’ sugar ¼ teaspoon peppermint extract 7-10 drops green food coloring or until desired hue is reached 1 cup of Cool Whip below or Stabilized Whipped Cream |
| Pudding Layer | 3.9 ounce box instant chocolate fudge pudding 1 ½ cups milk 8 ounce container Cool Whip or 1 recipe of my Stabilized Whipped Cream divided Hershey’s chocolate bar shavings if desired |
Chocolate Mint Dream Bars : Instructions
- Prepare an 8 x 8-inch baking pan by lining it with parchment paper, making sure the edges come up on the sides. This makes it easy to remove the bars from the pan and slice them before serving.
- Crust
- Put 24 Mint Oreos into a food processor and pulse until finely ground into crumbs.
- In a medium-sized microwavable bowl, melt butter for 20–30 seconds.
- Mix the cookie crumbs into the melted butter until well combined.
- Transfer the crumb mixture into the prepared baking pan, pressing it down firmly and spreading it to all edges.
- Place the pan in the freezer and let it set for a minimum of 30 minutes.
Chocolate Mint Dream Bars : Nutrition
| Serving | 1g |
|---|---|
| Calories | 589kcal |
We participate in the Amazon Services LLC Associates Program, an affiliate advertising program designed to provide a means for us to earn fees by linking to Amazon.com and affiliated sites. The links provided can lead you to products I recommend, and I may earn a portion of the sales or receive credit for future purchases made through those links. Your purchases support my baking, cooking, and butter habit, contributing to the life of this blog. Thank you very much for your support. Let’s continue to have fun in the kitchen!